With LiquidPlanner’s Dropbox integration you can store and manage your files in Dropbox, then attach a link to them from any plan item in LiquidPlanner. You can also upload files from your local drive, Google Drive™ or Box. Link to External Files and access documents stored with services such as Sharepoint, Microsoft OneDrive, Apple iCloud Drive, and SugarSync.
If you don’t already have a Dropbox account, visit www.Dropbox.com to create your free Dropbox account. There is no need to reference LiquidPlanner when you create your Dropbox user account.
Attaching Dropbox Files in LiquidPlanner
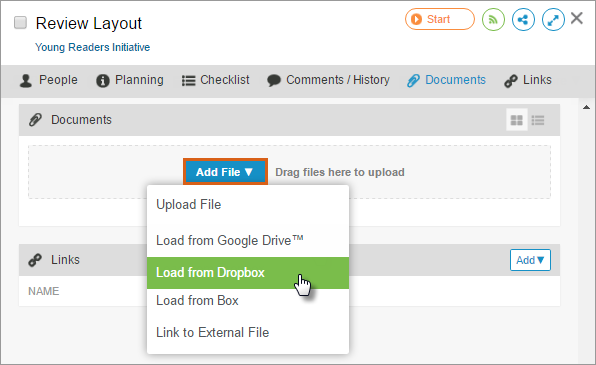
- In your LiquidPlanner workspace, go to the Documents section of the plan item’s Edit Panel.
- Click Add > Load from Dropbox.
- If prompted to do so, override the pop-up blocker in order to authorize LiquidPlanner.

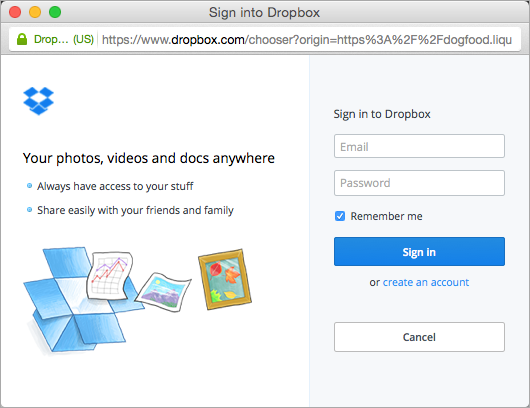
Log in to your Dropbox account:

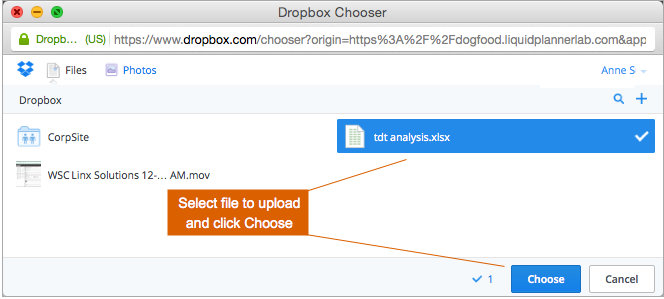
After completing the authorization, you’ll see your Dropbox directory, where you can choose the file to upload.

Additional Information
- Dropbox files are stored on the Dropbox servers, so they are not subject to LiquidPlanner file size or storage limits.
- Dropbox integration is limited to individual files only. It’s not possible to attach a link to a Dropbox folder.
- Your LP team members are not required to have a Dropbox account in order to view and download the Dropbox files that you attach in LiquidPlanner.
- If a Dropbox file is attached in LiquidPlanner and later updated via Dropbox, the link in LiquidPlanner will prompt you to download the most recent version.
- You can download and install Dropbox to your local directory. Changes made on Dropbox files via the local Dropbox directory will be reflected in the file linked to the LiquidPlanner plan item.
- It is not possible to upload a file into Dropbox via LiquidPlanner, even if it is a copy of a file that you downloaded via LiquidPlanner. Uploading into Dropbox is done directly in Dropbox.
Related Articles
Upload and Manage Files
File Management with Google Drive
File Management with Box

