Updated September 8th, 2021
As part of Release 20, a new Templates feature is available.
Templates are managed in the new Templates Collection. To start planning with Templates, navigate to the Projects tab and click All at the upper-left corner in the breadcrumb trail.
- Build a new template by adding a project folder to one of the sample packages & add or import tasks to the project.
- Configure the project template’s dashboard to save even more time down the road – all projects created from the template will have the same customized dashboard configuration as the project template.

NEW: Build a project template by importing tasks using the task import spreadsheet. In a project template, click into the Add Task field and select Import Tasks to download & import. Templates are unscheduled; the following fields aren’t imported –
- Done Date
- Target Start
- Target Finish
- ASAP Priority Override
- Assignment Scheduling
NEW: Default project templates are available in all new and existing workspaces. There are 2 packages with 9 project templates that are ready-to-use. The project templates are set with the following attributes:
- Project Name
- Project Description
- Project Dashboard
- Sub-folder and Task Structure
- Sub-folder and Task Names
- Task Status (based on the workspace’s default task status)
- Assignment Names & Estimates
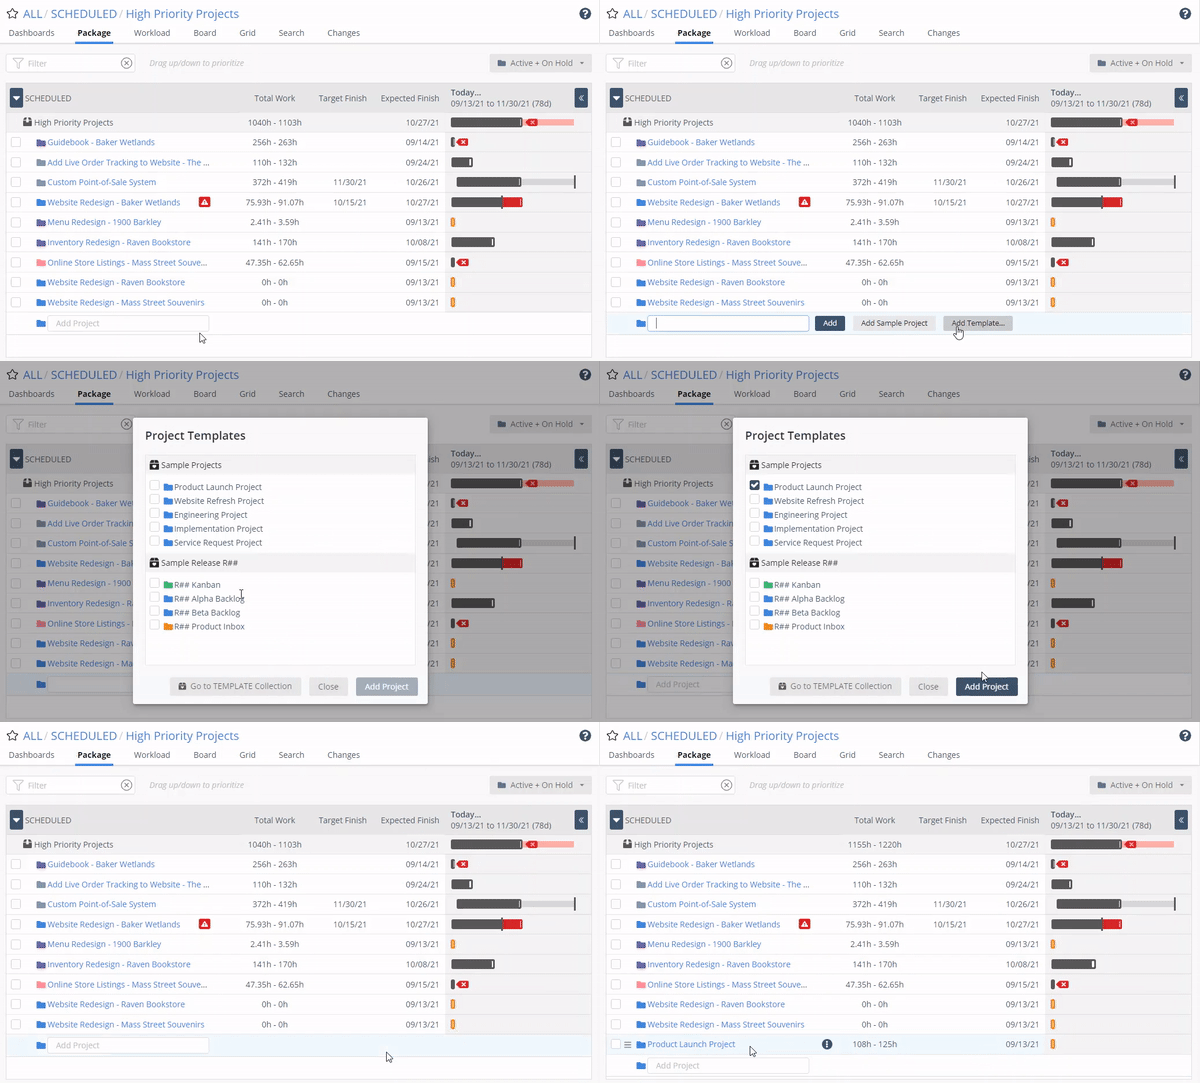
NEW: Create a new project from a template in Portfolio or Package view by clicking into the Add field and selecting Add Template. Templates can also be added using the right-click / 3-dot menu.

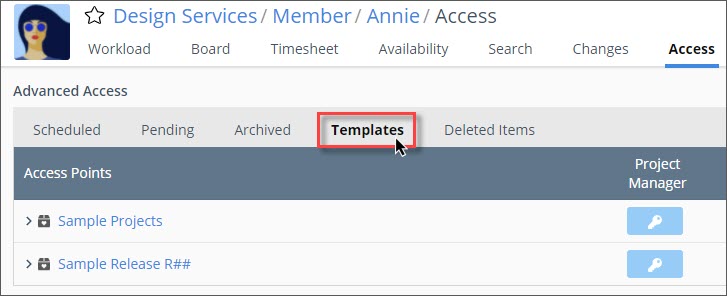
NEW: Customers on PROFESSIONAL and ULTIMATE Plans can control who can view & manage templates in a workspace. Navigate to Workspace and select Access, then choose a workspace member or group and manage access in the Templates subview.


