Story Point Schemes #
Navigate to Administration in the left-side menu to access Story Point Schemes.
![]()
Story Point Schemes help you plan and track work by assigning estimated points to tasks in a project. Schemes link specific point values to a range of estimated effort or time, making it easier to assign a standard amount of effort to tasks within a project. Each workspace starts with a default Story Point Scheme that can be customized, and you can also create additional schemes if needed. If you create multiple schemes, you can choose which one to make the default for the workspace.
| 1 |
Create Story Point Schemes and Associate Them to Projects # |
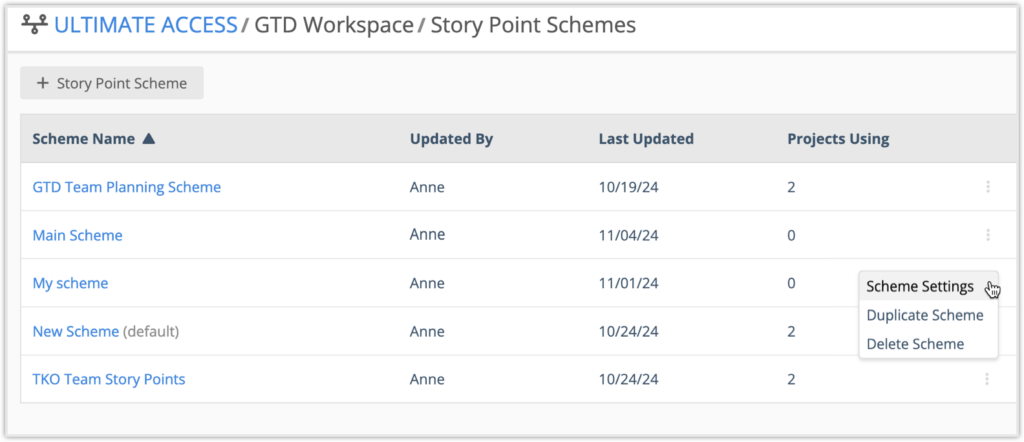
The main Story Point Schemes page contains a list of schemes that everyone in the workspace can sort. You can sort by Name, Updated By, Last Updated, and the number of Projects Using each scheme. Use the three-dot menu and select Scheme Settings to view and edit an existing scheme, Duplicate Scheme to make a copy, and Delete Scheme to remove it. Anyone has permission to view the Scheme Settings, and Project Managers at the Workspace, Workspace Managers, or Org Admins can edit. Scheme Settings are discussed later in the lesson.
Create a new Story Point Scheme #
To create a new scheme, you must be a Project Manager in the Workspace, Workspace Manager, and Org Admin. Select +Story Point Scheme to begin.
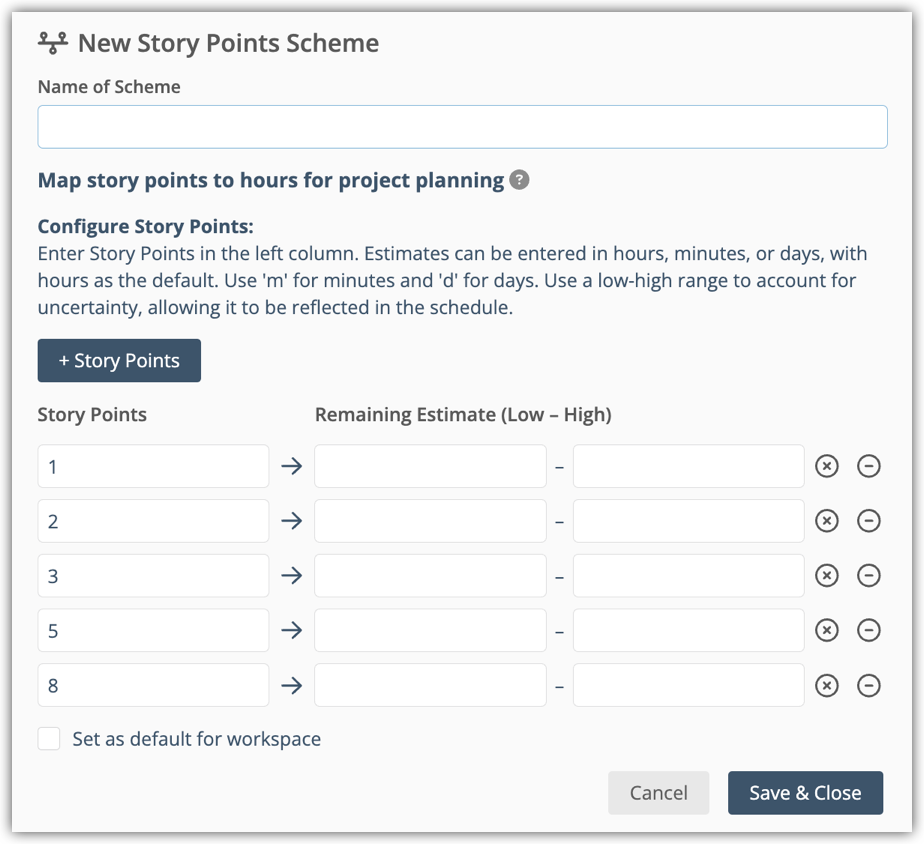
The New Story Points Scheme window lets you create a new scheme. You must first enter a name for the scheme. You can then map your story points to hours for project planning. The default story point values follow the Fibonacci sequence as it is common practice in agile methodologies. You can enter your own custom Story Points values in the left column. The minimum story point can be a 0, or any other decimal or integer number. Estimates can be entered in hours, minutes, or days, with hours as the default. Use ‘m’ for minutes and ‘d’ for days. Use a low-high range to account for uncertainty, allowing it to be reflected in the schedule. The estimate fields can also remain empty. To add additional Story Point rows, select +Story Points. Use the X icon to clear the values in a row and the minus icon to delete a row.
Note: When story points are applied to a task that does not have any assignments, low and high estimate fields are populated automatically to calculate the schedule. After the initial entry, the story point value and remaining estimate fields are independent of each other, and changing one does not affect the other.
Use the Set as default for workspace checkbox to make your new scheme the default. When you are finished with your scheme, select Save & Close. Your new scheme is now listed on main Story Point Schemes page.
Associate Schemes with Projects #
From the main Story Point Schemes page, you can also associate a scheme with one or more projects. Select the name of your scheme to begin.
A list of the projects that are associated with your scheme is displayed. To associate your scheme with one or more projects, use the Select Projects button to open a new window where you can select from all projects.
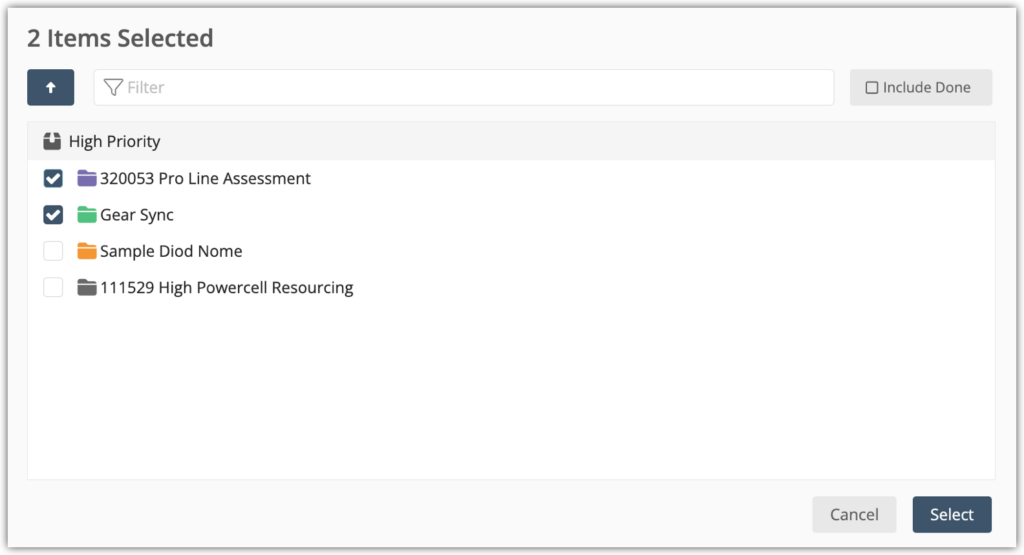
Anyone can access this page and see the Projects they have access to. Only Project Managers at the Workspace, Workspace Managers and Org Admins can associate or remove projects and groups from the Story Point Scheme.
Associate a story point scheme to one or more projects by marking the checkboxes. Use Include Done to include projects that have a Done status. To finish assigning the scheme to the projects, use Select. Projects that you associated with the scheme are now listed in a sortable table.

You can sort by Name, Collection, and Project Status. Select the name of a project to navigate directly to its Project View task list. You can also the three-dot menu here to edit your project.
| 2 |
Task Assignments and Scheduling # |
After you create Story Point Schemes and associate them with your projects, you can apply consistent estimation standards across tasks. When you apply story points to a task, they’re drawn from the project’s assigned scheme.
To view and apply story points to a task, navigate to the project that has the scheme, and select a task to open the task Edit Panel. The Story Point field is displayed in a drop-down menu and includes the values of your associated scheme. Use the menu to change the story points for the task.
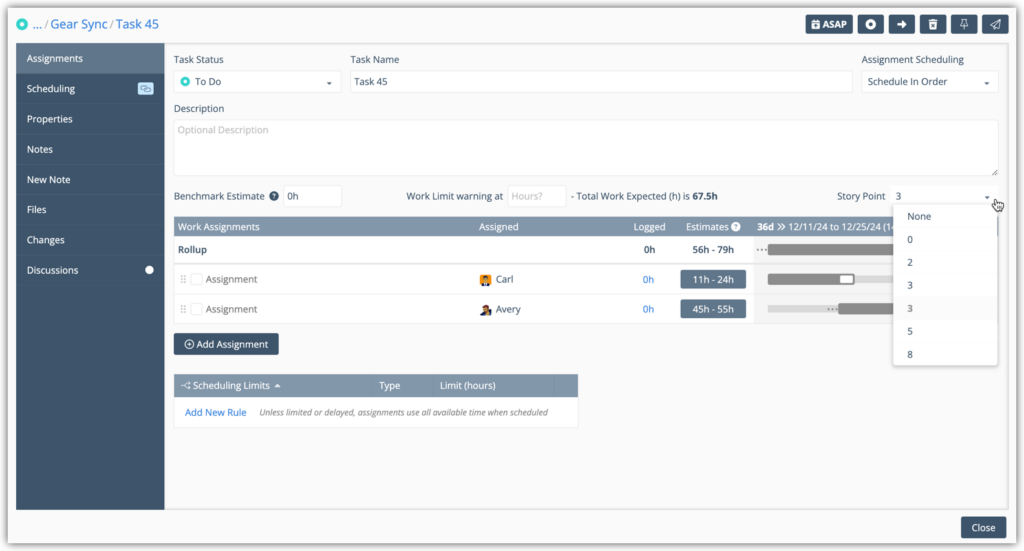
If you already have assignments on the task, story points do not affect the estimates for the task. If you create a new task, a row is created with estimated hours automatically mapped based on the story point. You can then assign a team member to the task, which schedules the work based on the estimate. Scheduling then calculates when an assigned member or resource will work on the task. After the initial story point and estimate are set, they function independently: changes to one won’t affect the other. Similarly, changes to team assignments on the task won’t impact the initial assignment or story point value.
The Properties tab of the task includes details about your Story Point Scheme.

The name of your scheme is displayed along with the story points for the task. Select View All Schemes to visit the main Story Point Scheme page.
If you are a Project Manager in the Workspace, you can also select Story Point Schemes at the project level. Select Edit Project and navigate to the Properties tab of your project to use the drop-down menu. This menu will be disabled for users who are not Project Managers. The Properties tab will also list the Total Story Points for the project, along with a breakdown of task statuses.

| 3 |
Manage Story Point Schemes # |
On the main Story Point Schemes page, use the three-dot menu and select Scheme Settings to view and edit an existing scheme. Anyone has permission to view the Scheme Settings, and Project Managers at the Workspace, Workspace Managers, or Org Admins can edit.
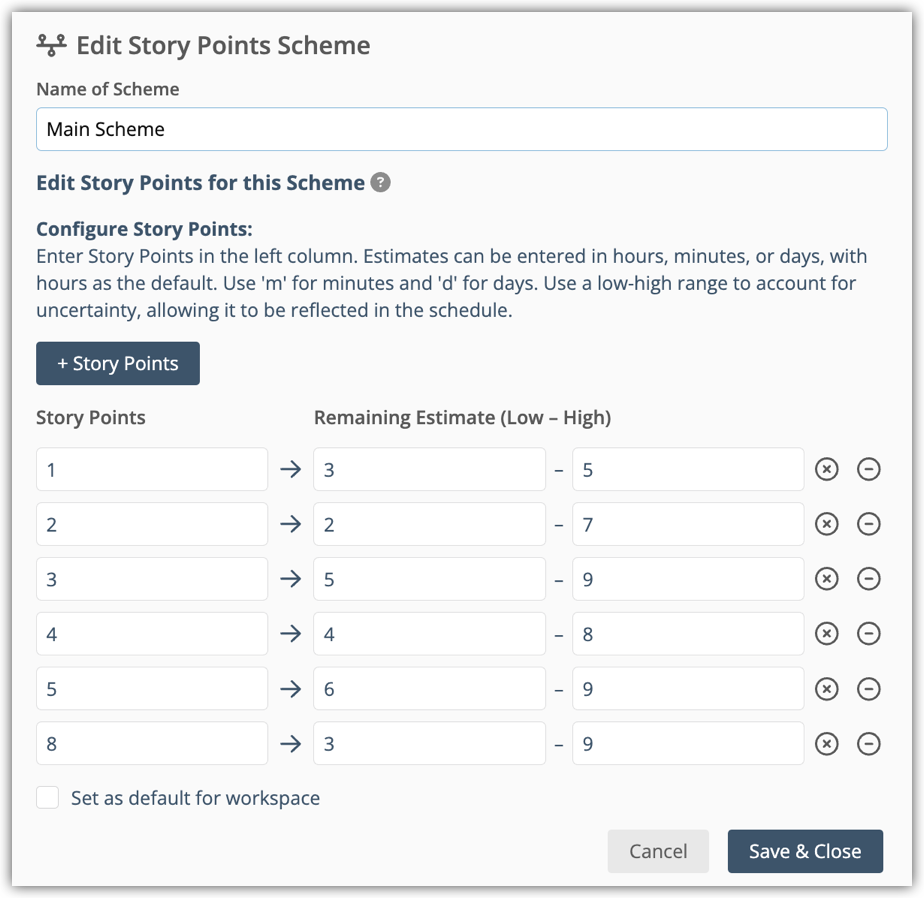
After editing a scheme, its updated values will be applied to new tasks and assignments. Modifications to Story Point Schemes, including edits or deletions, do not affect existing tasks. Even if a scheme is deleted, tasks retain their original story points. If a scheme associated with a project is removed, the project will default to the workspace’s default Story Point Scheme. This feature allows task estimates and points to remain consistent, even if schemes evolve over time.


