Effective resource management is essential to the success of any project. As a busy project manager, you have enough to do keeping various plates spinning without wasting your precious time herding cats as well. In addition to the other benefits that an online project management tool brings, LiquidPlanner, a resource management tool, delivers a host of features that will help you manage all your resources without breaking a sweat.
Here are five ways LiquidPlanner helps with resource management:
1. Tells you who’s who.
Key information for each team member is contained in detailed user profiles. This gives everyone a real identity in your workspace, and facilitates communication and collaboration. Here are three great ways to use the profile feature:

- Put a face to a name: An avatar can be added to each user profile which then gets attached to all workspace items that concern that team member. This is especially useful for distributed teams or new teams where everyone is not yet known to each other. It also lends a community feel to the workspace.
- Add virtual team members: You can add any number of virtual members if you want to start planning future work that hasn’t been allocated or assigned out yet. When the project is ready to go, you can easily transfer those tasks over to actual team members.
- Assign teams: Each user can be defined as belonging to one of a list of teams that you define so you can take a more departmental view of your project information. This also allows you to target specific teams with notifications, task update requests and so on.
2. Gives realistic resource profiling.

For schedules to reflect real life, you need to be able to accurately factor in each team member’s true availability for project work. Even those dedicated 100 percent to a project will have their productive time diluted by some non-project activities. LiquidPlanner lets you enter this information to create a realistic project schedule.
When resources are then assigned to a task, the duration will be automatically adjusted to reflect their availability.
3. Use rate sheets to see what you’re spending and making.
LP rate sheets let you set Pay Rules and Billing Rules to see how much you’re paying out for each resource, and how much they’re bringing in. This gives you information on how much you can bill, and how much you’re making from individuals on a project.


Once the rates are set up, the numbers are automatically calculated for work done and work remaining—figures that you can include in your financial metrics based on timesheet data entered by the team:

You can also set up material spends (e.g., hardware) as virtual resources and set up rates for them, too. This way your numbers can include non-labor costs and revenue.
4. Tells you who’s doing what.
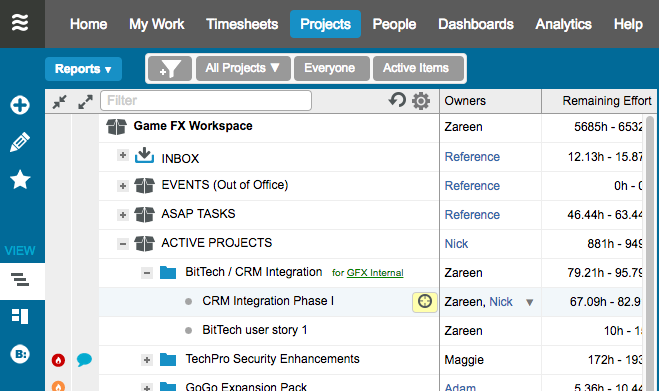
If you have many projects scheduled (and I hope you do), it can be difficult to see which resources are deployed where and when. LiquidPlanner offers a selection of built-in views and filters that lets you see just the resource information you need at any time. Here are a few examples.
This is a high-level Timeline view of a project. Expand a folder to see what tasks the team is busy with.
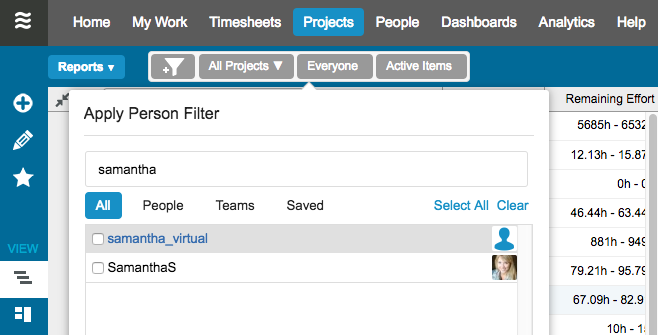
If I’m just interested in a single resource (or team) I can get an even clearer picture by picking the relevant filter:
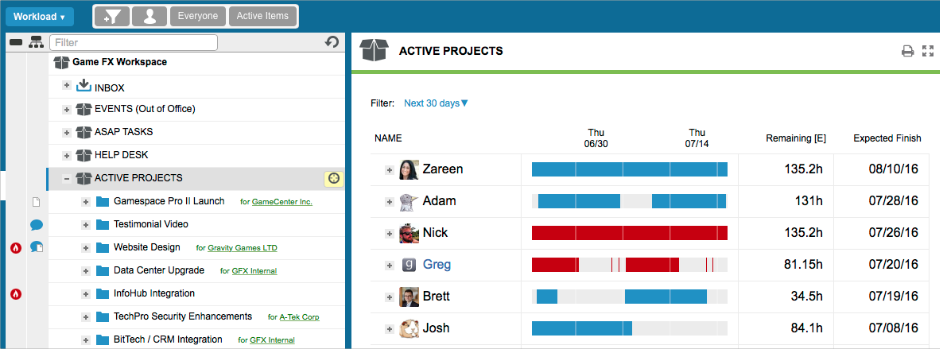
The Resource Workload Report (located in the People tab) is also extremely useful for seeing what everyone is working on over a period of time–who’s booked solid, who has some extra time, and where the risks are.
5. Provides automatic resource leveling.
Where you have the same resources deployed across a number of projects and tasks, getting the priorities and dependencies right can be a monster task—especially with the world changing all the time. Double-booking a team member onto two parallel tasks can spell disaster. Some project management software uses complex logic when automatically scheduling tasks. This can lead to much bafflement.
Instead, LiquidPlanner keeps it clear and simple. The higher up a project or task is in the plan, the higher the priority it has over what’s below it. The scheduling engine then uses this prioritization system and automatically sets up task dependencies based on the resources allocated to them.
Managing resources is a skill that comes with practice–along with great tools. To learn more, download our eBook, “5 Best Practices to Manage Project Resources Effectively.”


