Customize Task Status
Location: Administration in the left-side navigation
| 1 |
Task Status Settings Page # |
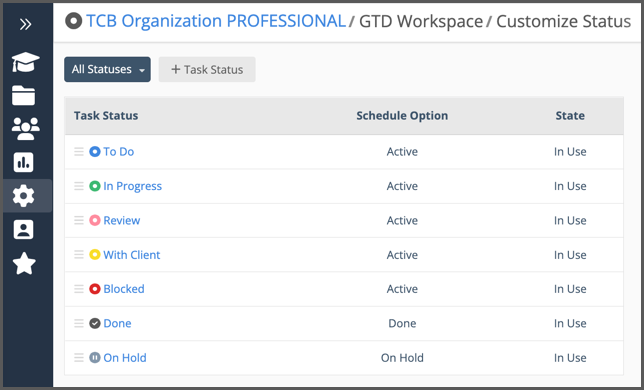
Task Status is a customizable feature for communicating the stages your work goes through from beginning to end. Each status corresponds to a scheduling behavior – Active, On Hold, or Done.
Task Status is defined by name, color, and schedule status.
Active tasks schedule when someone is assigned and work is estimated.
Scheduling is suspended when a task is on hold or done.
Use the gear icon in the left-side navigation to access Task Status via the Administration hub. Any workspace member can view the Task Status list. Organization Administrators and Workspace Managers are the only ones who can change the list order and create, edit, or archive a Task Status.
This lesson explains how Organization Administrators and Workspace Managers set up and manage the Task Status feature. There’s another lesson that all members should go through called, Task Status, which covers using them in the workspace.
Viewing the Task Status List
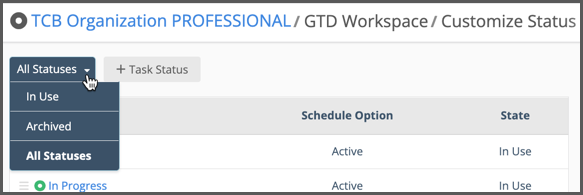
Use the drop down menu to filter the list by state: In Use, Archived, or All Statuses.
Changing the Task Status list order
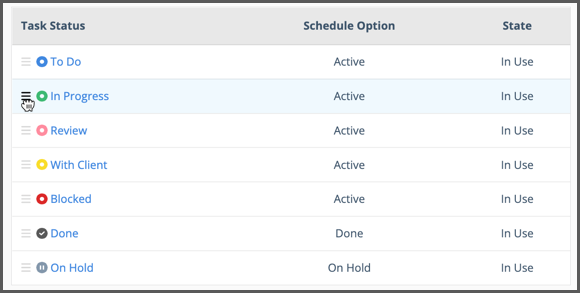
Change Task Status display order by dragging a status up or down the list. We recommend ordering your task status list from early to late stages, following the flow of your work.
| 2 |
Edit or Archive a Task Status # |
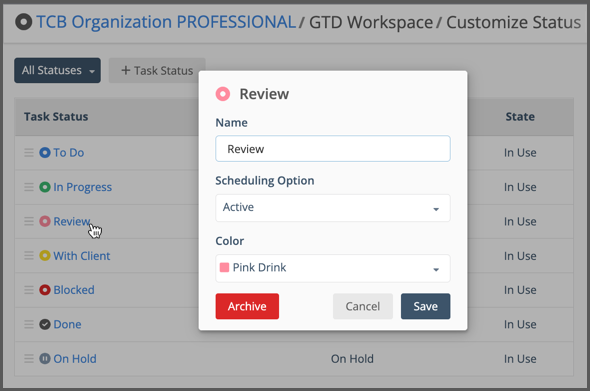
Click on a status to open the editor and make changes.
Editing a status changes it in real time on all the items where it’s been used. If you don’t want to lose the history, then archive it instead and create a new one to replace it.
When a Task Status is archived, it’s grayed out and can’t be selected anymore. It remains visible in picklists and filters until all the tasks set to that status change to another status.
Reactivate a Task Status
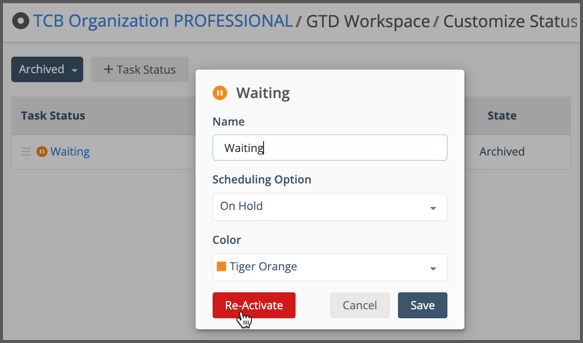
To reactivate an archived status, set the list filter to All Statuses or Archived. Click on the archived status to open the editor and use the Re-Activate button.
| 3 |
Create a new Task Status # |
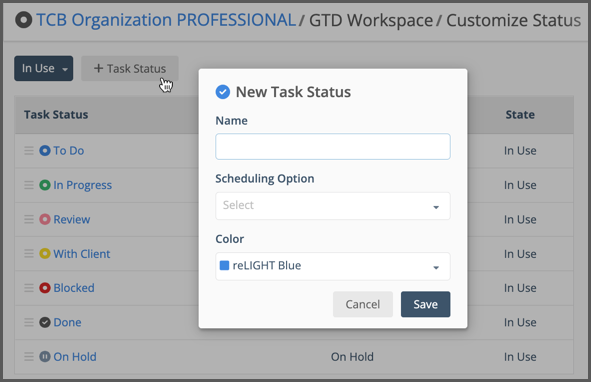
Use the +Task Status button to create a new Task Status. Choose the scheduling option and select a color. After the status is created, drag it to where it belongs in your list.
When creating statuses for your workspace the goal is to create a model that reflects your workflow and helps your team tell a story about where things stand. There’s always more going on than simply Active, On Hold, or Done . . . Is it In progress? With the client? Is someone Blocked? A task set to one of those statuses can be Active, and with that little bit of extra information provided by the status name, you know what needs attention.
Everywhere you see a task, you’ll know it’s status and understand how work is progressing.


