Setting up an archive to organize a large number of completed projects not only helps keep your workspace clean, but also makes reporting on finished work a breeze. Having a defined archive package means your workspace is easier to navigate so you and your team can quickly locate and reference past projects. Your older projects from quarters or years past will be separated from your most recently completed work.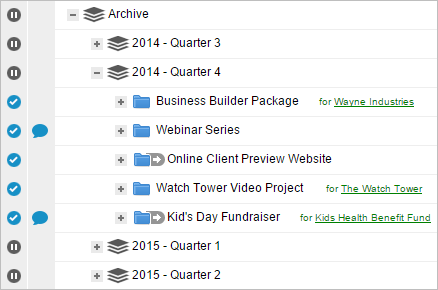
IMPORTANT NOTE: When moving completed work to a distinct Archive package, the work will lose its association with its prior location. This means that logged hours will no longer roll-up to that prior location. It also means that Trend reports and Baseline data for a prior location will no longer reflect those hours. For this reason, it’s best to establish a process for moving work to the archive on a quarterly or annual basis, after portfolio-level reporting is complete.
When to Create an Archive
A formal archive may not be necessary for every workspace as LiquidPlanner already has built-in functionality for organizing your workspace into active and completed work. By marking items done and using the status filter to group Active, Done, or All Items, your projects are being archived automatically. For many workspaces, this built-in method of filtering to “done” work is sufficient for organizing and viewing past projects. If this sounds like your workspace, no need to add an additional administrative process for archiving work – you’re already doing it!
That being said, as a workspace matures, and for workspaces with a higher volume of projects, the number of items revealed when filtering to “All Items” or “Done” increases. That’s a good thing because it means your team is making progress! Still, surfacing all these items at once can make it difficult to focus on just the most relevant information. If you frequently look back to done work, it’s time to consider a more formal archiving approach to organize that growing heap of completed work.
Understanding Status
Before we look at how to set up your archive, you’ll want to be familiar with Filtering by Status.
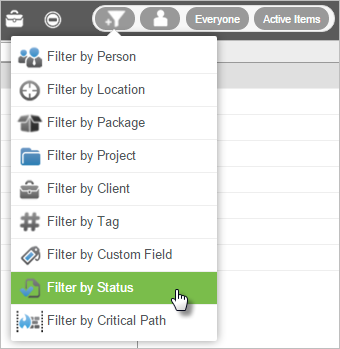
When an item is marked done in LiquidPlanner, it is considered archived. If your Projects view is filtered to Active Items (default filter), items that are marked done will fall out of view when the schedule is refreshed.
To see these done items again, change the status filter to either All Items or Done.
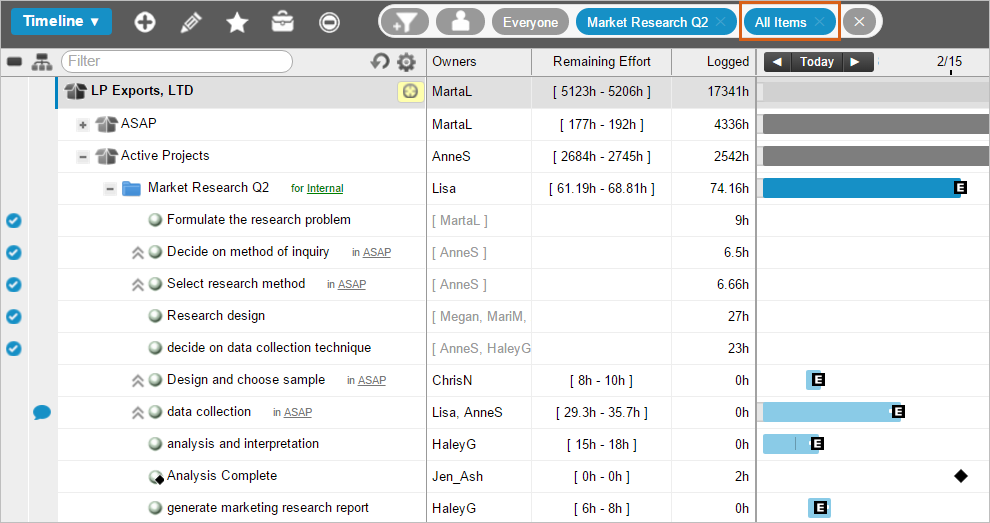
Filtering to All Items provides a view that includes active items, along with those that are marked done. This is helpful when reviewing project status, as it provides a view of the entire project scope – past and future, as illustrated below.
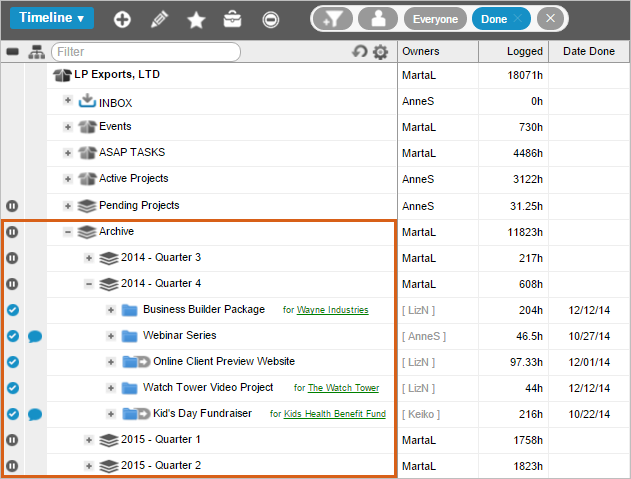
Setting the status filter to Done reveals only those items that have been marked done. Active items drop from view. This image provides a comparison view of the same project, filtered to Active Items on the left, and Done items on the right.

Keeping that status filter in mind, now let’s begin creating the archive.
Choosing an Archive Package
To set up an archive in your workpsace, we recommend adding a package called “Archive” and moving it to the bottom of the workspace. This could be a backlog package or a “done” package. Below we’ll discuss why you might choose to use one type of package over the other.
Option 1: Backlog Package
Backlog packages are visually different than active packages, so they signal to workspace members that the items contained aren’t part of the active portfolio. The backlog package itself is always visible with the Projects tab default filter, Active Items, while the completed projects within it are hidden since they have been marked done. This makes the archive easy to find and reminds people where old work is kept.
Use a backlog package if you prefer its visual cue and would like the archive to be visible from the Projects tab default filter. This works great when archiving is everyone’s responsibility or if past projects are referenced regularly by workspace members.
Option 2: Done Package
The main benefit here is that a “done” package and its contents stay out of view. To see this package’s contents, you’ll need to change the status filter to Done which will surface the Archive package at the bottom of the workspace. Then, you can drill in further to view done items.
Use a Done package when archiving is the responsibility of just a few workspace members. Having a package that’s out of the active view eliminates distractions for other members.
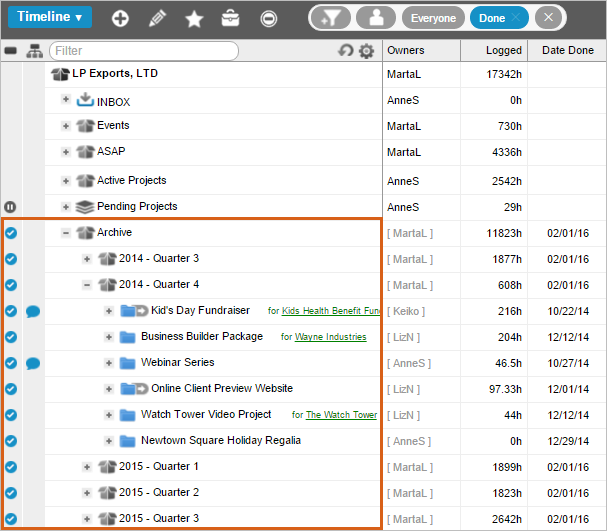
After deciding which package type to use, you’ll want to decide how to structure the archive.
Organizing the Archive
Within your Archive package, you could simply keep your projects in a flat list, or you could add additional hierarchy by adding another layer of packages to group and categorize your projects. Some workspaces like to set up the archive to mirror the structure of active work in the workspace since members are already familiar with that structure. How you structure the archive will depend on what grouping makes the most sense for your projects and how they will be reported on in the future.
Here are a few ideas for organizing your projects within the Archive package:
- By Month, Quarter, Year
- By Department
- By Product or Project Type
- By Project Manager
- By Client
- By Date Done
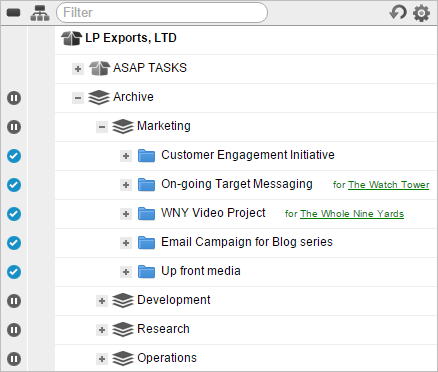
Here is one example that uses backlog packages for their archive and structures it by department:
Managing the Archive
We recommend outlining when work should be archived and who is responsible for archiving it. Add this information about maintaining the archive in your team playbook so workspace members can easily learn the process of how work is archived. Below are a few questions to consider when developing this process:
When should work be archived?
- As soon as the project is marked done
- At the end of the month or quarter
- At another reporting milestone
Who is responsible for archiving work?
- Project Owner assigned to each project
- Last person to mark an item done in the project
- A single or few Project Managers of multiple projects
- Someone designated as responsible for maintaining the archive
Moving Projects into the Archive
- Start by filtering the workspace to Done or All Items to view completed projects.
- Expose any columns that will help to organize projects into the archive. For example, if the archive is structured by year, expose the Date Done column to easily see when each project was completed without needing to open each edit panel.
- Drag and drop them into their designated new archive package (or change the package field in the project edit panel).
Now, admire how clean and organized your workspace is and enjoy the ease of locating and reporting on finished work!
Related Articles
Packages
Backlog Packages
Marking Items Done
Filters
Custom Status Filters

