You can upload files to any plan item via the Edit Panel. Files can be uploaded from your local drive, Google Drive™, Dropbox, or Box. Link to external files and access documents stored with services such as Sharepoint, One Drive, Apple iCloud Drive, and SugarSync.
Upload Local Files
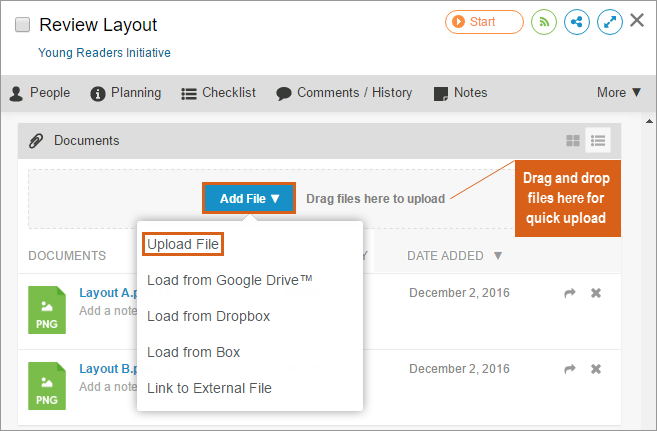
Open the edit panel for an individual item and click on the Documents link at the top or scroll down to the documents section.
- Click Add > Upload File
- Click the Choose Files button
- Locate and select the file in your local directory and click the Finished button
Link to External File
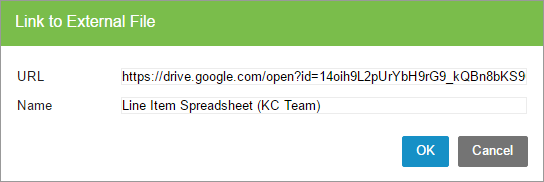
Link to External Files and access documents stored with services such as Sharepoint, One Drive, Apple iCloud Drive, and SugarSync. Only members with permission to access the document within the service will be able to access the document via the external link in LiquidPlanner.
- Click Add > Link to External File
- Enter the external file link URL
- Identify the item by name
- Click OK
Add Notes, Move or Delete Documents
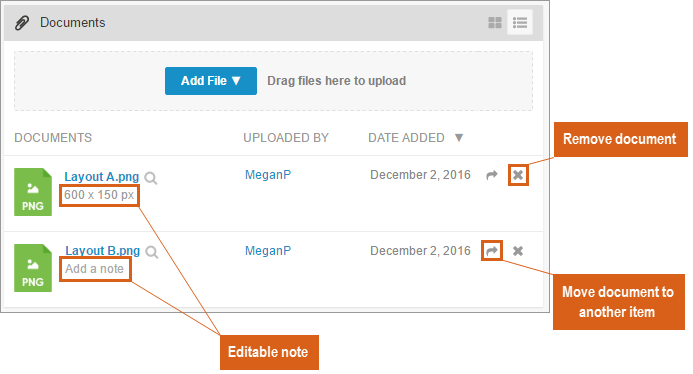
- Hover over the document information that you have uploaded and you will have the option to add notes to the document or delete the document from the plan item.
- Once you have created a note, you can click on the Note button again to edit the current note.
File Version Control
There are a few ways to manage multiple file versions in LiquidPlanner so it’s easy for various people to make edits to the same file and always know they’re working from the most up to date version of the file.
Using LiquidPlanner File Sharing Integrations
Upload files to plan items using one of LiquidPlanner’s integrations with GoogleDrive, Dropbox, or Box or another file sharing site using the Link to External File option. When a file is uploaded from one of these sites, the file link in the edit panel will link directly to where that file is saved on that file sharing site. This means you’re always opening the current version of the file and any changes made will be saved to that same master copy, eliminating the need to re-upload an updated version to the plan item. By clicking the link in the edit panel, the next person to access the file will be directed to the new most recent version.
Using a Manually Uploaded File
Files can also be uploaded to plan items directly from your computer. When this is the case, it’s important to make a note next to the file in the Documents section indicating the file version information. Using this method, first download the file from the plan item, make the necessary edits and save it to your computer. Then, re-upload the file to the plan item and add the note to let others know what file version has been most recently uploaded. You may also decide on a business rule with your team to delete any old versions from the edit panel once a new version has been re-uploaded.
View Documents on Containers
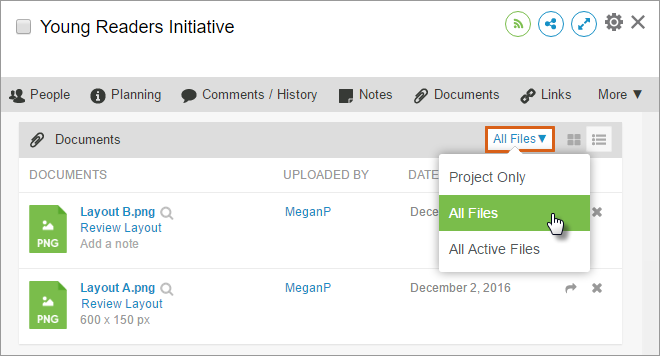
- When viewing the document list on a container (Package, Project or Sub-folder), use the dropdown to filter the list and adjust which documents to include in your view.
- Select Package Only, Project Only, or Folder Only for a list of the documents that have been attached directly to that container. It will not include the documents attached to sub-items within that container.
- All Files will give you a list of all the documents attached to active and done items within the container and sub-items.
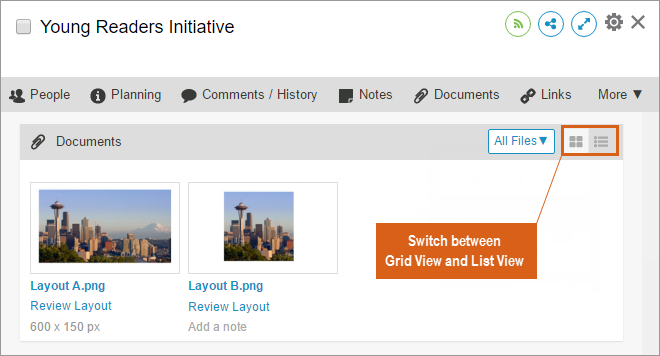
Grid View and List View
You can switch between Grid View and List View by clicking on the icons in the top right corner of the Documents section.
Additional Notes
- The size limit for each uploaded file is 100MB.
- Total workspace-wide storage limit varies by subscription type: Professional = 100GB, Enterprise = 500 GB.
- All workspace members with access to that plan item can view the file and save a copy to their local drive.
Related Articles
File Management with Dropbox
File Management with Google Drive™
File Management with Box

