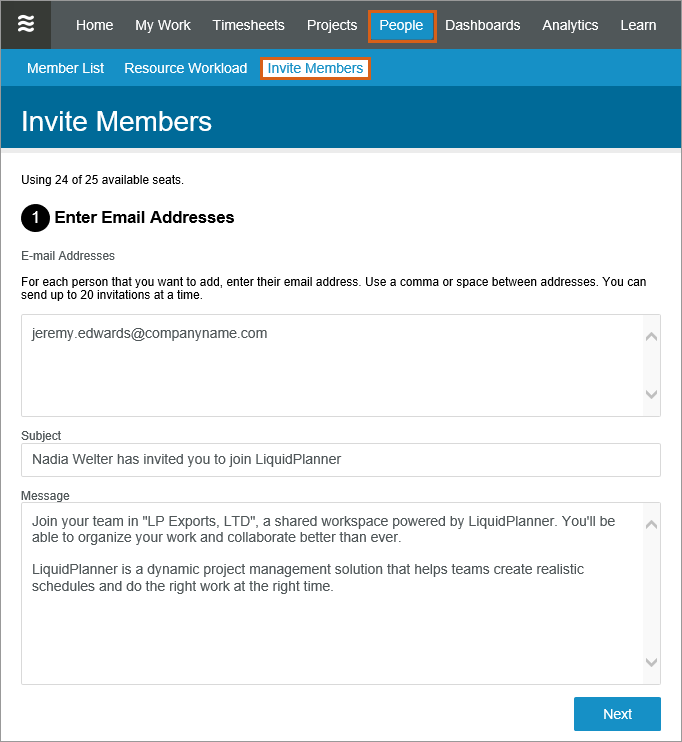
Workspace owners & Administrators can invite people into their workspace the following ways:
- The People tab > Invite Members
- The People tab > Add+ button > Add Member
- User Menu > Settings > Members and Access > Add Member
Step 1: Enter the email address(es)

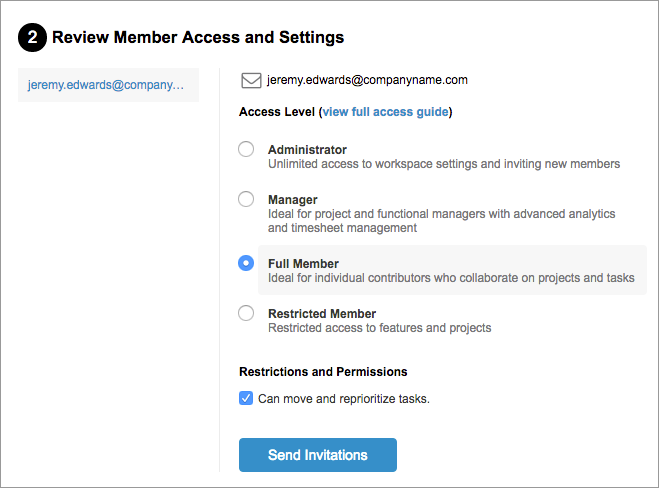
Step 2: Choose the access level for this new person
If you choose Administrator or Manager, you can finish by clicking Send Invitations.
If you choose Full Member, determine whether or not you will allow the workspace member to re-prioritize items in the schedule and check or un-check the box under Restrictions and Permissions accordingly. Then you can click Send Invitations.
If you’re not sure which access level is appropriate, read more detail in our Member Access Levels & Privileges help article.

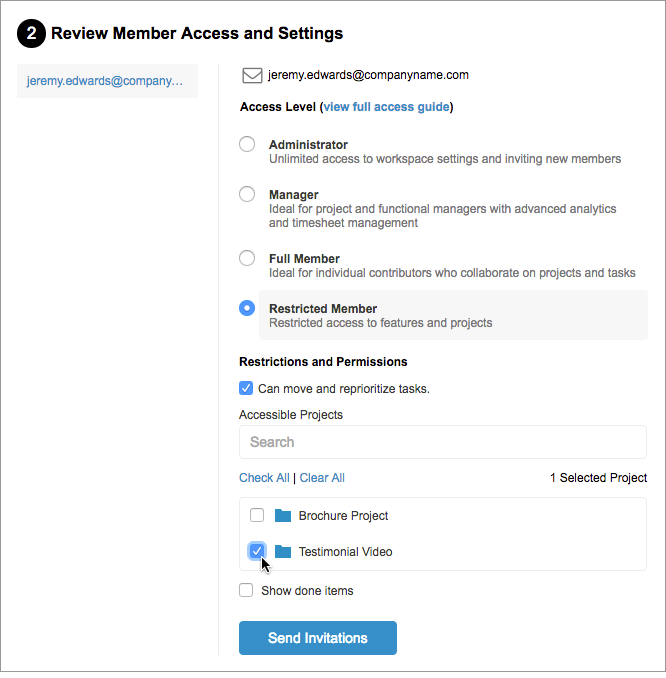
If you choose the Restricted Member access level, determine the following:
- Decide whether or not you will allow this person to re-prioritize plan items and check/un-check the box accordingly.
- Select the specific projects that you want this person to have access to – type the project name(s) into the search bar to find it quickly.
Then finish by clicking Send Invitations.
Each person will receive an email inviting them to create a unique LiquidPlanner sign-in. After completing the activation process, they will become an active member of your workspace.

Resending and Retracting Invitations
If an invitation needs to be resent or cancelled, go to the People tab > Member List and hover over the invitee member row. Under the Action column for that member, click the link to resend or retract the invitation. Quickly find all pending invites by typing “pending” into the Search field on the People tab.
Related Articles
Member Access Levels and Privileges
Virtual Members
Billing Summary and Product Upgrades

