LiquidPlanner allows you to import data from MS Project in XML format, which means you don’t have to start from scratch after you’ve already created a file.
File size: LiquidPlanner can create a maximum of 500 tasks per import. Typically not every line item in an import file translates to a LiquidPlanner task; but you still want to bear this in mind if you have a large file to import. With that limit as a guideline, you may have to break a large file into separate files for import into LiquidPlanner.
Preparing MS Project Data for Import
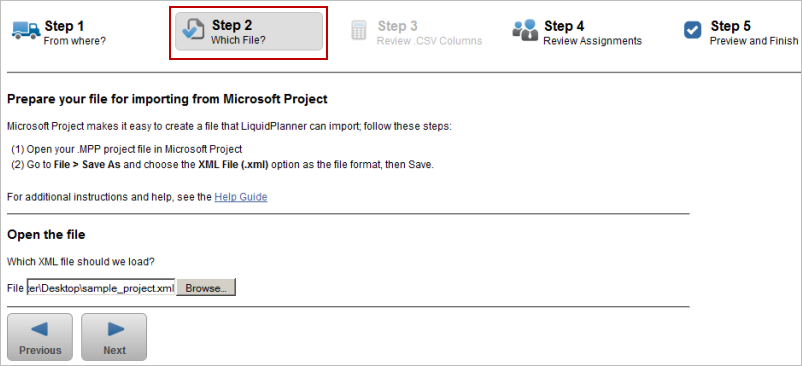
Before you can import MS Project data into LiquidPlanner, you’ll need to save your MS Project export as an XML file. Just follow these simple steps:
- Open your .MPP project file in Microsoft Project
- Go to File > Save As and choose the XML File (.xml) option as the file format, then Save.
That’s it! Now you’re ready to import the XML file into LiquidPlanner.
Importing Your XML File
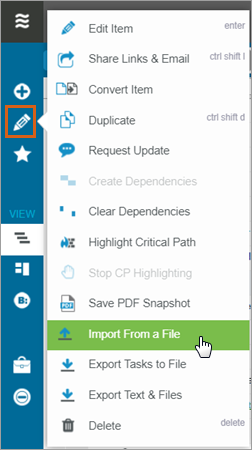
In the Projects tab, go to the Edit and Share items menu > Import From a File:

Step 1 – choose “Import from Microsoft Project”:

Step 2 – upload the XML file:

Step 3 of the import wizard not applicable for XML imports
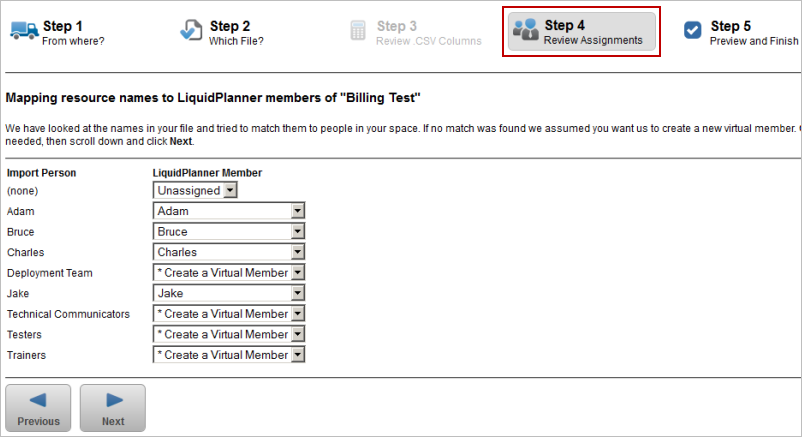
Step 4 – review resource mappings:

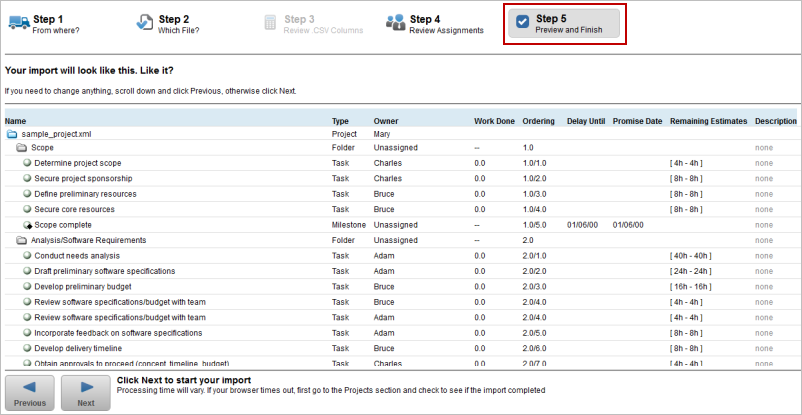
Step 5 – preview imported data and click “next” to start the import:

Understanding Your Imported Data
Remember that LiquidPlanner schedules work in a fundamentally different way than MS Project does. With priority-based scheduling, your tasks are scheduled based on their priority order and their effort, not calendar duration. For this reason, you should not expect your task start or end dates to map in exactly as they were in MS Project.
This import process gets your tasks into LiquidPlanner, but from here you will undoubtedly need to review the effort estimates and priority order of your tasks. You’ll also need to add any required dependencies.
Related Articles

